After you've filled out your onboarding form, feel free to get a head start on your own!
We've listed everything you need to edit on this page.
Aside from this, start reviewing other material throughout this database
to better understand what you have access to and how to optimize usage!
The best route is to go through everything in the priority order it is listed in.
Business Information
Business Information
To edit your business information, go to Settings > Business Profile
✅ Fill in Business Name
✅ Fill in Business Email
✅ Fill in Business Phone Number
✅ Fill in Business Website URL
✅ Fill in Time Zone (This needs to be exact!!! Very important not to skip this step!!!)
✅ Fill in Missed Call Text Back Message
Personal Profile
To get to your profile, click on Settings at the bottom of the navigation menu. Then click on Profile under "My Business"
You can modify various settings on your profile. Add a photo, setup an email signature and update your password.
Make sure to also update your personal availability if you will be using our calendar booking system.
You can also integrate Zoom or Outlook on this page.
Custom Values
What are custom values:
Custom Values are essentially "coded links" which are placed throughout the CRM, allowing you to have something in 100 different places, but you only have to change it in this one spot! Magic!
In the Basic Business Snapshot, we have already created some custom values, enabling you to start using them immediately. However, it is essential to customize them initially to ensure they align with your requirements and objectives. Go to "Settings" then "Custom Values"
List of Custom Values we've added: (Must Edit)
☑️ Business "From" Sending Email
Add in the email that you want to show as the primary "sending from" in your CRM account.
☑️ Business From Sending Name
Enter the name you would like to showcase as the primary 'sending from' identity in your CRM account. This will be the displayed sender name when communicating with clients.
☑️ Business Name
Add in your business name just the way you want it to show up everywhere. This will be the main name people see when you're reaching out, not a 'location name'.
☑️ Company's Generic Email Signature
Craft your email signature using HTML, and paste the generated HTML code here. Your email signature will then be applied to your outgoing emails.
Optional at this time / can easily add later:
☑️ Core Offer
Enter the name of your Signature Offer here. If you ever want to change it, you can do that right in this space.
☑️ Default Call Booking Page URL
Start by creating your own calendar, integrate it into a funnel, and then share the funnel's URL here. This will enable you to effortlessly distribute the booking link.
☑️ Sales - Proposal
Build your sales proposal template and then add the link here. This makes it easy to automatically add your proposal to sales automation. If you ever need to make changes, just edit it here.
☑️ Your primary zoom/meeting link
Set up your Zoom link and add it here.
Custom Fields
What are custom fields: Custom fields are used to capture any information you would like to collect from a customer through your surveys or forms.
You have the capability to generate your own custom fields. Custom fields serve a crucial role in forms and surveys, capturing unique data and information that goes beyond the boundaries of standard inquiries such as "Name, Email, and Phone Number". They allow for more personalized and targeted data collection, enabling you to gather insights that are specifically relevant to your business needs. Whether you need to know a respondent's job title, their favorite product from your line, or any other piece of information that isn't typically requested, custom fields provide the flexibility to tailor your data collection tools to your specific requirements.This is important to edit before you import your contacts.
To add your custom fields, go to Settings > Custom Fields
Contacts
While managing contacts within your CRM, you possess significant control and flexibility over their data. Within each individual contact card, you have the ability to add or remove tags, incorporate them into automation processes, initiate calls, send messages, compose emails, and perform numerous other actions. This level of customization and management allows for a more personalized approach to your contacts, ultimately enhancing communication and fostering stronger relationships.
Contacts must be formatted as a CSV file in order to upload to your database. Google sheets is a great easy way to prepare these files.
✅ Name each of your columns such as Name, Email, Phone, and so on. Once you've added your required custom fields from the previous step, you should not have any issues mapping the columns to your CRM's fields.
✅ When you have your contacts in the spreadsheet, select File, Download, and select CSV format.
✅ Navigate to Contacts on the left menu.
✅ Click on the Import button which is the button with the area pointing up.
✅ Drag and drop your file onto the screen or select Upload and select your file.
✅ Click Next.
✅ Make sure to match the data to the correct fields.
✅ Click Next.
✅ Give your import a name and click on additional options.
✅ Add a tag to your contacts so that they can be segmented in their own list.
✅ Once imported, you can create a smart list.
Integrations
Integrations
To guarantee everything functions smoothly, you just have to integrate a few accounts into your CRM.
☑️ Go to the integrations section.
☑️ Find the Google integration option.
☑️ Follow the prompts to connect your Google account.
☑️ Typically, you might need to authenticate and grant necessary permissions.
Facebook / Instagram
☑️ Go to the integrations section.
☑️ Find the Facebook / Instagram integration option.
☑️ Follow the prompts to connect your account.
☑️ Note: To use Instagram DM's, you need to connect your Instagram Account with a Facebook Page.
Stripe
☑️ Navigate to the payment or billing section in your CRM.
☑️ Look for the option related to payment gateways or Stripe.
☑️ Connect your Stripe account by entering the required credentials or API keys.
☑️ Ensure that you configure payment settings and currency preferences.
Calendars
In the Basic Business Snapshot, we have already linked certain calendars to specific automations, enabling you to start using them immediately. However, it is essential to customize certain fields initially to ensure they align with your requirements and objectives.
Calendars to Edit:
☑️ TEMPLATE - Consult Call
☑️ TEMPLATE - Discovery Call
Change Calendar List:
☑️ MEETING DETAILS
Adjust the calendar name if needed to align it with the purpose of the call.
Edit the calendar description to better explain the purpose of the call and what can be achieved during the interaction with the contact.
Change the custom URL to something that makes sense for this calendar name.
Add the users who will use the calendar and make sure their meeting locations are correct.
☑️ AVAILABILITY
Modify the days and times when your team will be available for calls on this calendar.
Adjust the meeting interval, duration, minimum scheduling notice, date range, buffer time, etc.
☑️ FORMS & PAYMENT
Select the form you want users to complete before booking an appointment; the prequalified form is already linked to the calendar.
Personalize your thank-you message, which will be displayed after users book their appointments.
☑️ CUSTOMIZATION
Customize the calendar's appearance by choosing colors that align with your brand design.
If you wish to incorporate a new calendar into your CRM with a specific email sequence tailored to it rather than using a generic one, follow these detailed steps:
☑️Create a New Workflow for the New Calendar:
Navigate to the "Master Appointments Workflow" folder in your CRM.
Generate a new workflow associated with the recently created calendar.
☑️Edit the "(CDB) Master Appointment Status Changed (all)" Workflow:
Access the workflow titled "(CDB) Master Appointment Status Changed (all)."
Add a new trigger at the beginning of the workflow with the following specifications:
Event Type: Normal
Appointment Status: Confirmed
In Calendar: Select the newly created calendar.
Save both, the trigger and the workflow.
☑️Implement an If/Else Action in the Master Appointments Workflow:
Insert an if/else action at the top of the master appointments workflow.
In the first branch:
Link the trigger you added in the previous step.
Under this branch, add the action "remove from this workflow" to customize the workflow for the specific calendar.
Ensure that all other actions are placed under the alternative branch.
Save the updated workflow to apply the changes.
Workflows
To edit your email templates, go to Automation > Workflows
Here you will find any existing workflows, make new ones as well as edit an existing workflow.
To understand the workflows that came with your account, watch your account overview.
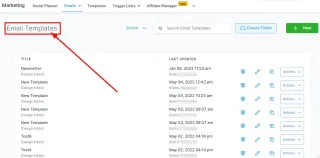
Email Templates
To edit your email templates, go to Marketing > Email > Templates
Here you will find any existing email templates, make new email templates as well as edit an existing email template.
View the templates available for you here.
Sites
To get you started, we have populated your CRM with a handful of Site/Funnel Templates for your convenience!
To edit your templates, go to Sites > Funnels or Websites
🖊️ TEMPLATE - Business Coaching - Book A Call
🖊️ TEMPLATE - Coaching - Teal (Home + Book + TY)
🖊️ TEMPLATE - Consulting Service - Book A Call + Payment Step
🖊️ TEMPLATE - Lifestyle coaching - Book A Call
🖊️ TEMPLATE - Simple Product Funnel
🖊️ Email Unsubscribe Confirmation
Note: This is a one-step funnel designed for you to EDIT and create a branded and customized unsubscribe page that avoids harming your email reputation.
*Don't forget to edit your Email Unsubscribe trigger link by going to Marketing > Trigger Links > Links
Forms
In the snapshot, there are three forms ready for you.
TEMPLATE - Facebook Name?
TEMPLATE - Opt In
TEMPLATE - Pre-Qualify Form
*You may want to customize the "TEMPLATE - Pre-Qualify Form" by adding relevant questions that are tailored to your business.
To edit your forms, go to Sites> Forms > Builder
Pipelines
To get you started, we have populated your CRM with the main pipelines for Sales & Marketing.
Watch your account overview to understand the current setup.
However, if you need a Service Specific Pipeline, we have prepared one for you to edit.
It is just here for you in case you want to adapt this pipeline to suit your specific product/service.
Change the first stage by adding the name of your service and make any other necessary modifications to ensure it aligns with your specific needs.
NOTE: There are no workflows currently attached to this pipeline, this is simply an example of something you can set up.
To edit your pipeline, go to Opportunities > Pipelines
What's Next?
Get to learn your CRM & build! Best way to do this is to go back to the main page and go through everything in the order you see it on the page!